Friday, June 14, 2019

Final thing reflection


It is really hard to believe that this workshop has come to an end....  my first blog post for this series of classes was from 2010...  my how my own skills have changed, what tech I use now, and what changes have been made in my library space too....

Polly you have done an amazing job putting together resources, topics and keeping us all organized and inspired.  That is how I will end my experiences over that last several years with Cool Tools..... inspired.  I look back at the number of things I have learned, tried, and brought into my teaching space.  There are so many more that I want to try and work in.

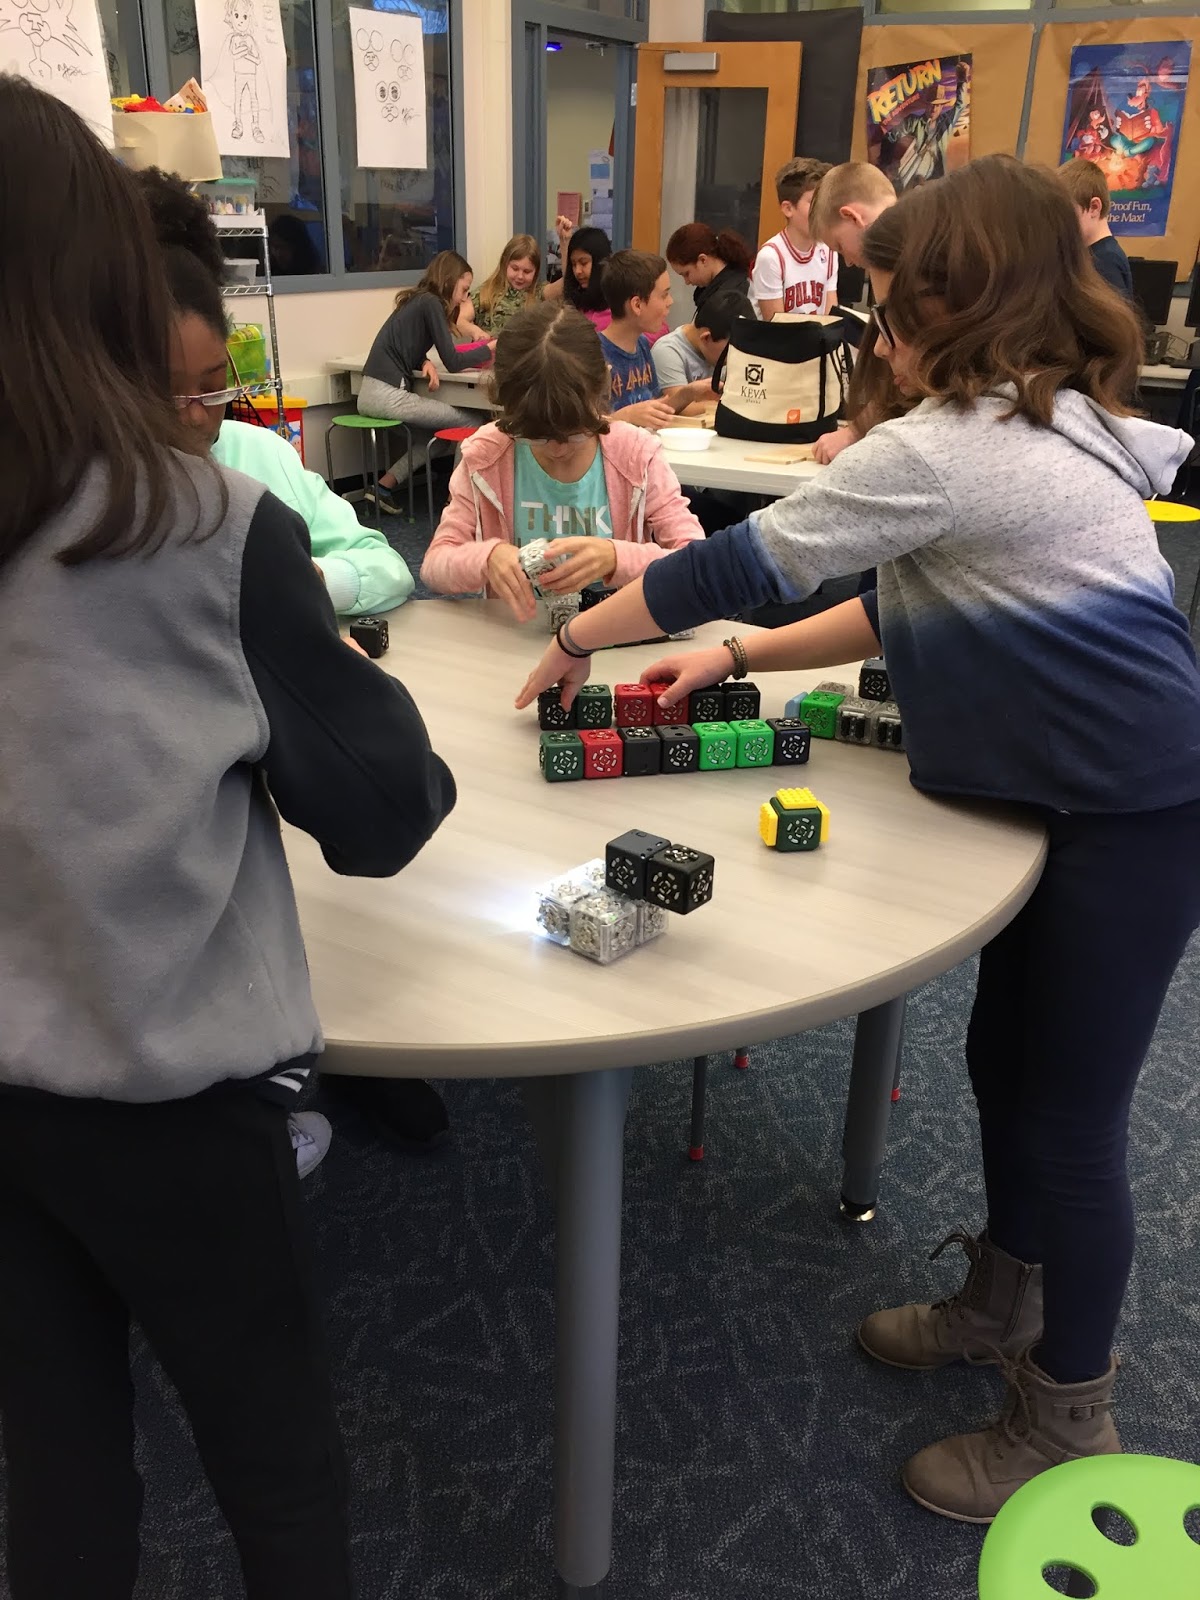
I was at a LMS meeting several weeks ago and one of our activities was to look at goals for ourselves for next year.  My goal was to try to incorporate at least one more or new technology piece with each grade level at my school.  This year I concentrated on turning my computer lab into a makerspace.


We got some donations and I was able to purchase some hands on materials.  I was able to bring each grade level in at least every other month for a week or two so that they could use different materials.  I used some of my budget or Scholastic dollars to add things that I thought the kids would enjoy.  It was a big success, but I didn't really get to do a lot of tech projects as we went from desktop computers to iPads and cloudbooks.  So at this past meeting I realized I need a blend of the makerspace and tech.  This summer I want to look at each grade level and see what I can add in easily with what I have.  Starting with #booksnaps using PicCollage at the beginning of the school year.  I think it will be a fun way for the kids to share out a book or two, recommend books to others and practice a few tech skills.  I would also liike to add in a few more tech projects to the Makerspace: LegoWeDo, claymation, stop animation and revisit green screen photos with a few more classes.


Tuesday, June 11, 2019

Thing 14 -- Bitmoji and Booksnaps


I had time to log into bitmoji a few weekends ago and do the creating on the computer of an avatar... then when I got to the end, I couldn't get back... a little frustrating.  It wanted to put it into gmail, but for some reason it didn't work and there wasn't a quick way to go back into the page to make any changes.  Well as I dug a bit deeper, bitmoji works better as an app which I later downloaded to my phone.  From there I could see my creation in various additions.  I am not sure I would really use this at all.  I wasn't really happy with some of the "situations" or phrases that were used for me personally.  You really have to comb through to find something decent.  Too bad there isn't a kid friendly creation that they could use.  I think kids would really love to do this.  My 4 year old keeps asking if he can create one, as he watched me and helped pick out some of my features.  One other thing I didn't really like was I thought that there would be a little more you could do with it or picking backgrounds or details without a person's face.


I suppose students would get a kick out seeing a few of these around the library, or on bookmarks or book reviews or even letters home, etc...  Not sure I will really put these in to fore front of my mind.  I since creating them, I will at least try to use them once and a while.

One of the other topics on this assignment was booksnaps.  I love the idea of booksnaps.  I hadn't heard of them before.  As I was looking into it, I came across an old podcast with an interview of the creator.  I have for years creating book trailers with my students, but the project took months.  I think kids might have an easier time of this.  I want to start with these when we go back to school in the fall.  Something they read over the summer.  I really wanted to see if I could do this with summer reading suggestions with my fifth graders, but I am running out of time seeing them once a week if that at this point in the year.  So starting the year with it might give them a fun transition back into school to show off a favorite book for other students to learn about.  So basically:

How to make #BookSnaps

  • Read, think, & be creative
  • Take a picture of the passage that you connect with in some way.
  • Highlight, underline, or box the part of the text with which you are connecting.
  • Create a visual representation that shares your thinking.
  • Use emojis, stickers, speech bubbles, draw pictures, etc.
  • Include the title and author or book cover to give credit.
So I just finished Ban This Book by Alan Gratz. And decided to use this as my #bookchat subject.


A fun book with a lot of potential for discussing and talking about even more books! I can't wait to try this project with my students in the fall.


Friday, June 7, 2019

Thing 25 -- Green Screening

I purchased a green screen kit at the beginning of the school year, but never had the opportunity to open it or discover even what was in the kit, let alone try something out!  Over the past two weeks, my 4th grade scholars need to do a podcast or video PSA on concussions.  I gave them the option of just filming or using the green screen.  Half of the groups took me up on it!

Two weeks ago after they wrote their scripts, I set up the screen and let them film, (still not knowing exactly how we were going to to the green screen process, but I knew I would figure it out.)

The kids had a ball filming and getting all there takes for the video.  I even had a few want to use the teleprompter app (like real newscasters) so they had it scrolling while they were acting their scenes.
They really helped each other out with filming and starting and stopping the iPads.

Fast forward to this week where we have to edit what they filmed.  I had them use the wevideo app to start their movie and add their different video takes.  Our district has a few licenses, so I signed up as a teacher and played at home sending from the app to the account.  The details of editing work better on our cloudbooks than the app.  The kids really enjoyed editing, adding music, learning how the chrome key color worked to add a background.  Lots of fun!  We watch the videos once they were complete. Overall a fantastic project, not without a few bumps in the road but tremendous.

Here is one group's final video with green screen...


 You can see it here too.

I can see using this a little more now, even with younger students if i was the major editor, as we don't have enough site licenses.  But maybe using a few free apps like Legos or Stikbots would work as well.  I can't wait to film some students doing animal projects with the habitats in the background,etc.  Not that I have gotten my feet wet with this, I can't wait to try it in many ways next year... maybe a greenscreen club!

I also want to look further into the ChromeKey app. for still pictures, etc. And I just saw veescope-live-green-screen-app which also looks interesting.  Will have to play a lot this summer with it.

Final thing reflection

It is really hard to believe that this workshop has come to an end....  my first blog post for this series of classes was from 2010...  m...